Introduction to Residential Roof Installation
When it comes to your home, the roof is one of the most vital components, offering protection from the elements while ensuring energy efficiency. Whether you’re building a new home or replacing an aging roof, understanding the key steps in residential roof installation is crucial. This comprehensive guide will walk you through the entire process, providing insights into important considerations to ensure that your roof is durable, functional, and aesthetically pleasing.
Understanding the Importance of Residential Roof Installation
A roof does more than just shield you from the sun, rain, and snow; it plays a major role in your home’s energy efficiency, structural integrity, and overall comfort. Choosing the right roofing material, proper installation, and timely maintenance are all crucial aspects of ensuring your roof serves its purpose for years to come. A high-quality roof installation can provide lasting protection and enhance the curb appeal of your home.
Step 1: Choosing the Right Roofing Material
One of the first and most important decisions to make during residential roof installation is selecting the right roofing material. Various options are available, each with its pros and cons, including asphalt shingles, metal roofing, clay tiles, and wood shakes. Your choice of material should be based on factors such as budget, climate, and aesthetics.
- Asphalt Shingles: The most common and affordable roofing material, asphalt shingles offer a variety of styles and colors. They are relatively easy to install and repair, making them an ideal choice for many homeowners.
- Metal Roofing: Known for its durability, metal roofing is a great choice for those looking for a long-term investment. Metal roofs are resistant to extreme weather conditions and are energy efficient.
- Clay Tiles: Clay tiles offer a unique aesthetic, particularly for Mediterranean or Southwestern-style homes. They are durable but heavier, requiring additional structural support.
- Wood Shakes: Wood shakes create a rustic, natural look but require more maintenance than other materials. They also tend to be more expensive and are not suitable for all climates.
Step 2: Assessing the Condition of the Existing Roof
Before proceeding with the actual installation of your new roof, it’s important to assess the condition of the existing one. If you’re replacing an old roof, a professional roofer will inspect the structure to determine whether it needs to be completely torn off or if a simple overlay can be done. This step will also include checking for underlying issues such as leaks, rot, or structural damage that could affect the new roof’s installation.
Step 3: Preparing for Installation
Once you’ve chosen the right material and assessed the current roof’s condition, the next step is preparation. Preparing for roof installation involves securing necessary permits and clearing the area. Roofing companies will usually handle the permits, but it’s always a good idea to verify that they are in place before work begins. Additionally, ensure that the area around your home is clear of debris, vehicles, and obstructions to give the crew safe and easy access to the roof.
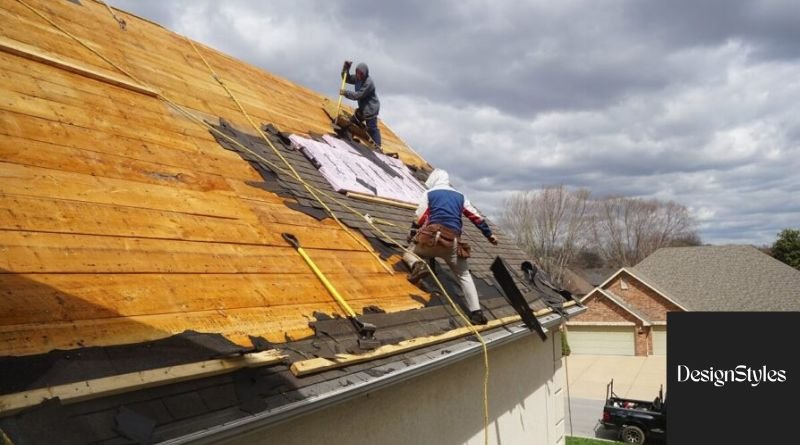
Step 4: Installing the Underlayment
The underlayment is a critical component of the roofing system. It acts as a barrier between the roofing material and the roof deck, providing additional protection against moisture. The most commonly used underlayment materials include felt paper, synthetic sheets, or rubberized asphalt. A professional roofer will install the underlayment to ensure it is secure and properly aligned to prevent any water infiltration.
Step 5: Installing the Roofing Material
Once the underlayment is in place, the next step is installing the roofing material. This process varies depending on the type of roofing material you’ve chosen. For example, asphalt shingles are typically installed in overlapping rows, while metal panels are secured with fasteners. During this phase, special care should be taken to ensure that the roofing material is installed in such a way that it is both secure and weather-resistant.
- Asphalt Shingles: Each shingle is nailed into place, starting from the bottom of the roof and working upwards. The shingles are layered and overlapping, ensuring water flows off the roof rather than into the structure.
- Metal Roofing: Metal roofing panels are laid from the bottom to the top and secured with screws or fasteners. The seams are sealed to prevent water from seeping through.
- Clay Tiles: These tiles are carefully placed and interlocked. They need to be laid in rows, starting from the eaves and working upwards. Each tile is securely fastened to the roof deck to prevent wind damage.
- Wood Shakes: Wood shakes are installed starting from the bottom of the roof, with each piece overlapping the one below it. Nails are driven through the shakes to secure them to the underlayment.
Step 6: Installing Flashing and Ventilation
Flashing is another essential component in residential roof installation. It refers to the metal strips installed around roof penetrations, such as chimneys, vents, and skylights, to prevent water from leaking into the home. Flashing should be carefully installed to ensure that there are no gaps where water can seep in.
Ventilation is also critical for maintaining the health of the roof and attic. Proper ventilation helps regulate temperature and moisture levels within the attic, preventing issues such as mold growth and ice dams. Vents are typically installed at the peak of the roof and at the eaves to allow for adequate airflow.
Step 7: Final Inspections and Clean-Up
After the roofing material has been installed and all necessary components (like flashing and vents) are in place, a final inspection is necessary to ensure that everything is installed properly and that the roof is secure. This inspection involves checking for any gaps or areas that may need additional sealing, ensuring the roof is leak-free.
Once the inspection is complete and the roof passes the necessary standards, the crew will begin the clean-up process. This includes removing any debris from the installation process, such as old shingles, nails, and materials. The site will be cleared and any leftover roofing materials will be disposed of properly.
Step 8: Ongoing Maintenance and Care
Once the roof is installed, regular maintenance is key to ensuring its longevity and performance. Regular inspections should be conducted, especially after storms, to check for any potential damage. Roofs should also be cleaned periodically to remove leaves, moss, and debris that can impede proper drainage and cause water to pool on the roof.
Roof maintenance may involve simple tasks such as cleaning gutters, replacing damaged shingles, or sealing leaks. By staying on top of these tasks, you can avoid costly repairs and ensure that your roof lasts for decades.
Key Considerations for Residential Roof Installation
There are several key factors to keep in mind when planning your residential roof installation:
- Cost: The price of roof installation can vary greatly depending on the materials, size of the roof, and complexity of the installation. Make sure to get multiple quotes and choose a reputable contractor.
- Climate: Consider the weather conditions in your area when choosing roofing materials. For instance, if you live in a region prone to heavy snowfall, metal roofing might be a good option due to its snow-shedding capabilities.
- Roof Lifespan: Different roofing materials have varying lifespans. Asphalt shingles may last 15-20 years, while metal roofing can last 40-70 years. Consider how long you plan to stay in your home when making your decision.
- Warranty and Insurance: Make sure your roof installation comes with a warranty that covers both materials and workmanship. It’s also important to ensure the roofing company is properly insured to protect you from liability.
Conclusion
Residential roof installation is a significant project that requires careful planning and execution. From choosing the right materials to ensuring proper installation techniques, every step plays a role in the overall effectiveness and longevity of your roof. By understanding the key steps involved and considering all the necessary factors, you can ensure that your new roof will provide reliable protection for your home for many years. Regular maintenance will further extend its lifespan, helping you avoid costly repairs down the line.
May Also Read: designstyles